Finding a skew in the first leg mortise

After getting about halfway through the mortise, I flipped the leg over and started cutting from the other side.
I was making really good progress with my cuts, and eventually broke through to the other side. And that’s when I noticed that my holes were quite badly misaligned.
It turned out that the cuts on both sides of my mortise had drifted off the vertical by a few degrees. It was enough to create a difference of about 5mm where they joined in the centre.
So, that is not good.
I seriously considered just scrapping this leg piece and starting again with a new one, but ultimately I decided to persevere and see if I could salvage this.
By putting a clamp up against the reference face, and using it as a visual guide to see whether my chisel was travelling correctly, and making sure to stand at the end of the work piece rather than side-on, I was able to get a much better direction on my cuts.
I ended up cutting down through the original (intended) centre of the mortise, clearing out part of the sloped sides from both ends to get a kind of compromise.
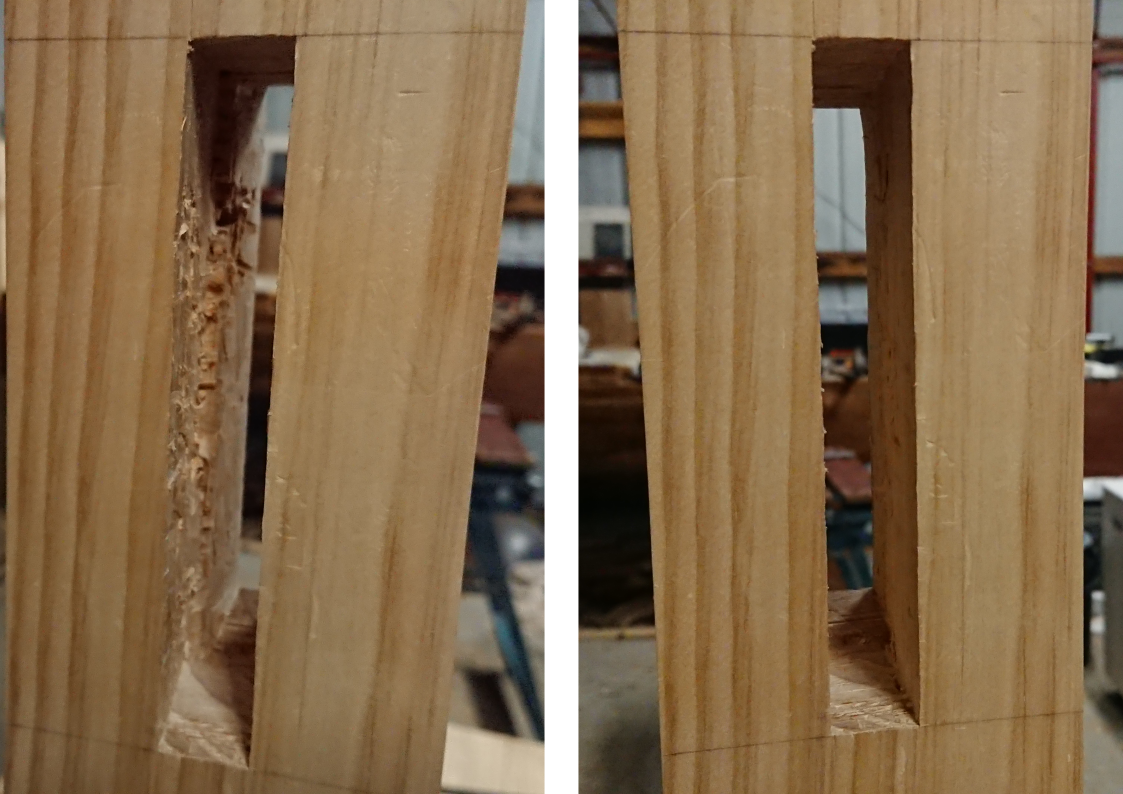
In the right-hand image, it almost looks like a normal mortise. But in the left-hand image, you can see what a botch it is.
I really won’t know just how successful the salvage effort was until I start trying to fit a tenon into it. If I can’t get a tenon through, I may need to pare back the walls of the mortise further.
Since the glue on the tenon won’t have much to purchase on to inside of this mortise, it might be worth adding a draw bore just to make sure the joint stays nice and tight.